Transferring Designs to a USB Key
We send our files out in the zipped format.. We create our files with the latest version of WinZip. This allows us to put all of your designs into one compressed file and to include instructions in PDF format. You must "unzip" the file before you can use the designs or see the instructions.
Please note: Embroidery Software (like Embird or Buzz Tools, etc) will not unzip the files correctly and may tell you that the file is invalid or corrupt. Please use a utility that was designed for this purpose.
If you need help unzipping your files, please click here.
For those new to embroidery or to computers, USB is simply a nice way to get files from your computer to your embroidery machine. It can have several different names: "USB Key", "USB Stick", "Flash Drive", "Memory Stick", etc. All of these names are for the same thing.
- Once the files are unzipped, you need to know where they are on your computer. Open Windows Explorer and navigate to the folder that has your designs.
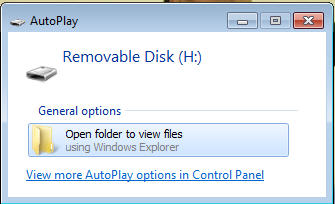
- If you purchased designs on a CD you do not need to unzip anything. Just put the CD into your computer. A window should pop up asking what you want to do, click on View Files.
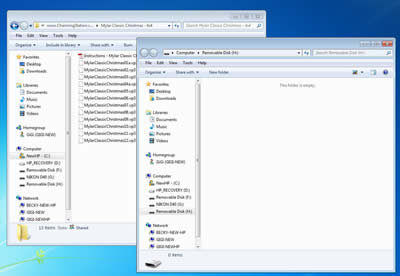
- In either case, your computer should now look something like this:
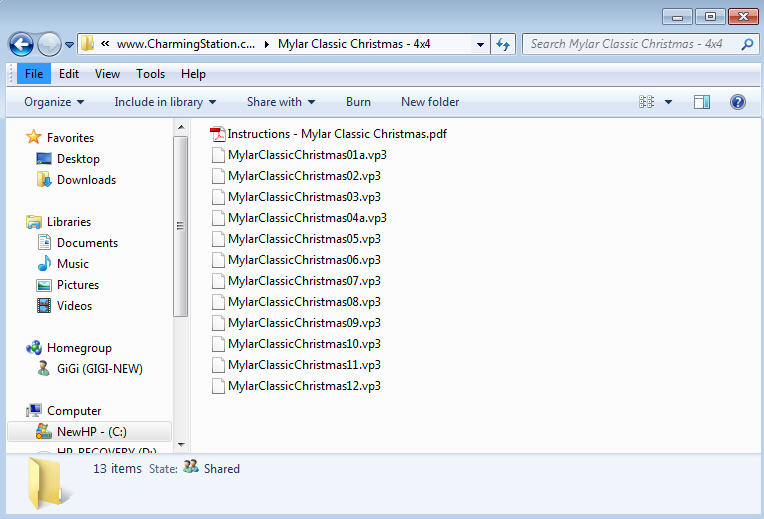
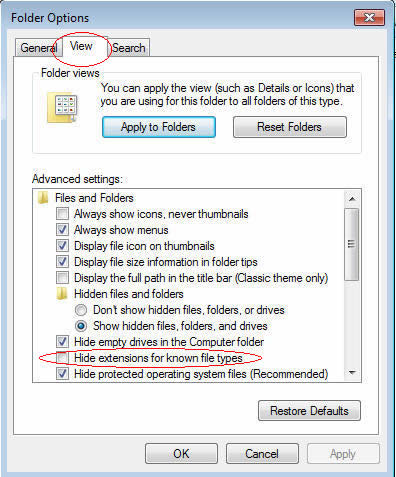
What you see in the left column above will be different from this image - it will be based on what is on your computer. The important part is what is in the right window. Check your screen to make sure that you are seeing the format for embroidery designs on the end of the file name. If you don't see .PES or .HUS or anything with ".something" at the end of the file name, please do these quick steps:
|
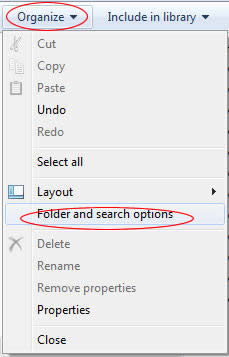 |
Changing this setting will allow you to see the extensions (the letters at the end of a file) so you can find the right format for your machine. Changing this setting will not hurt any other component or software on your machine. It will simply make copying files a lot easier. This setting will remain "set" even if you power off your computer. This is very helpful and won't cause any problems. You do not need to change any other settings on this list - even if your list looks different from the one pictured here! |
 |
|
 |
You should now see two "windows", perhaps overlapping like this photo. There is a super easy way to get these positioned so you can see what is in both windows at the same time.
|
 |
|
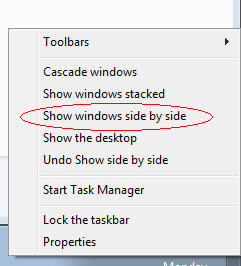 |
| You will now have two windows side by side on your computer screen. | |
The one on the left is the list of designs on your computer. The one on the right is the list of designs (if any) on your USB To copy designs:
|
 |
- If you want to copy more than one design at a time, you can click on the first one, hold down your shift key, and click on the last one. Then right-click to get the menu to Copy. This copies all of the files from the first one you clicked on to the last one you clicked on the list. Then right-click in the other window and select Paste.
- If you want to copy several that are not next to each other on the list, hold your control key down and click once on each file name you want. Then right-click and select Copy. Then right-click in the other window and select Paste.
- When you are finished copying, you can move the USB from your computer to your embroidery machine.
Here are a couple of additional notes:
- Each machine company can use data differently. Many do not allow you to make folders on the USB; others may require designs to be in a folder. You will have to check your manual to be certain how your machine wants things set up.
- Only put the designs you actually want to do on the USB for one sewing session. If you store a lot of designs on your USB, it will take your machine a lot longer to pull them up and display them for you to use.
- As long as you are copying from the computer and pasting to the USB, you still have a copy on your computer. That means when you are finished, you can delete the ones on the USB (because you have the original on your computer). If you are new to embroidery or computers, double check the window showing your designs on the computer to be sure they are still there after you have done the copying.
- Never, ever, ever plan to store something permanently on a USB. These are very subject to getting corrupt and there is no way to recover data on a USB if this happens. Always back up your designs to a back up service like Carbonite or to CDs (something that is permanent and that you will be able to access if something happens to your computer).
- These are just basic instructions. If you need more specific help, please contact your machine dealer.


 Contact us: